Entice Customers with Personalization in AEM with Adobe Target
Business Use Case:
Customers want relevant data when they are purchasing or ordering something online on the different type of devices such as PCs Tablets and Mobile. For example, men and women have different interests when they come to an online store and they would feel irritating when they see irrelevant content. One major reason for this is identical authoring of the website and personalized content. This replication causes slipups and extra work, as authors must log into at least two systems to maintain site content.
Adobe Target delivers personalized content based on a combination of machine learning and rule-based approaches that incorporate behavioral, contextual, and offline variables. Now Adobe offers the integration of Adobe Experience Manager with Adobe Target, which has simplified authoring personalized content.
Apart from the above below is the list of more use case which can be solved by using this integration:
- Easily set up and run the tests to determine the best offers, messaging and content.
- It is simple to test these two versions of content to find which outperforms the best.
Solution:
By Integrating the AEM with Adobe Target, we can achieve the power of AEM capabilities of cross channel’s content delivery, multi-language site capability, and responsive design without coding for all devices with the intelligence of Adobe Target which is used to provide relevant content to the relevant customer. AEM provides the capability to integrate with the Adobe target to achieve the benefit of using Adobe Target’s capabilities directly within AEM.
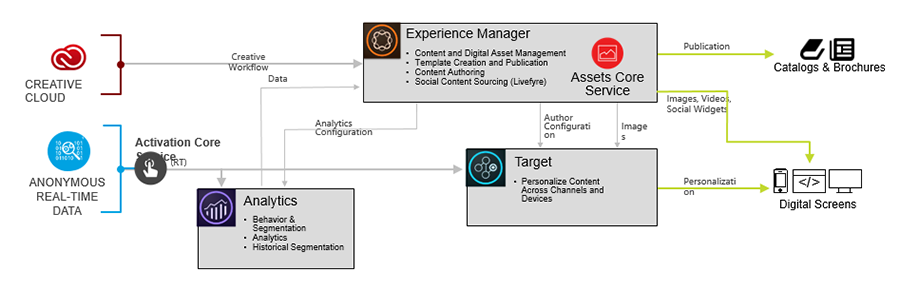
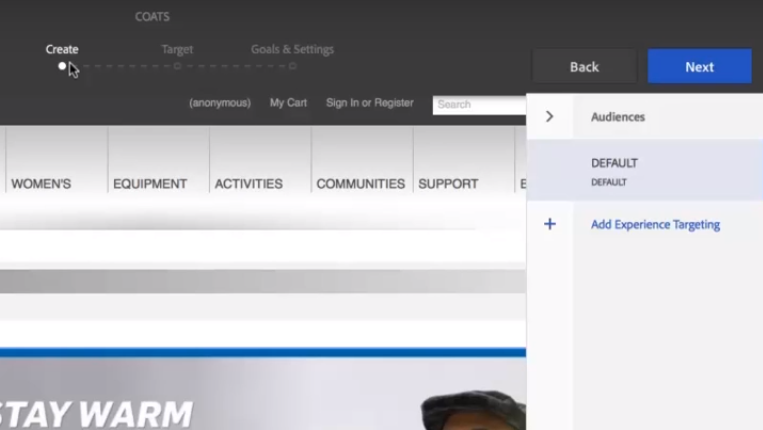
Targeting the Experience:
AEM and Adobe Target combine together facilitate to target the right customer with the right content. As a demonstration, the following are the steps to personalize the content according to audience type.
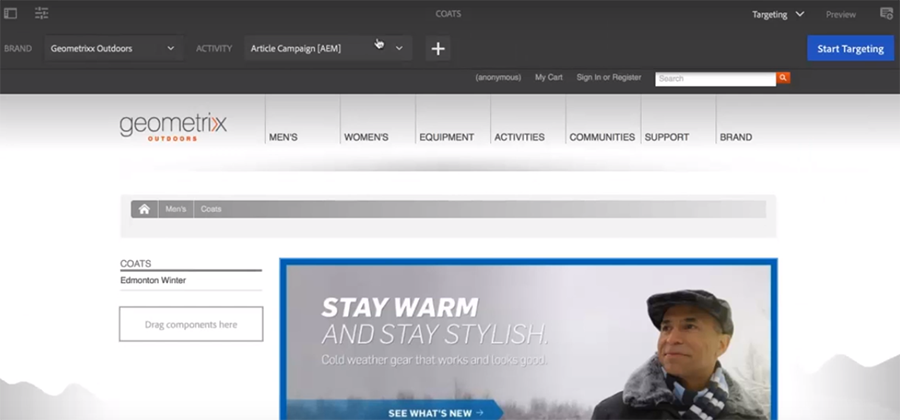
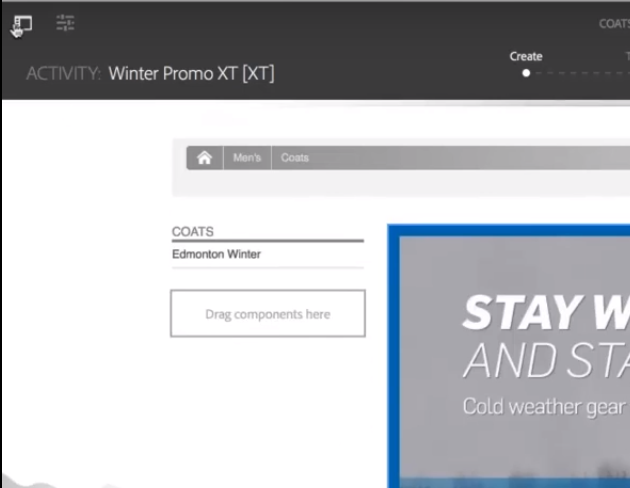
1. Logon to AEM and in Sites, go to your site and edit any page in it. It will open the AEM editor where you can edit the page.
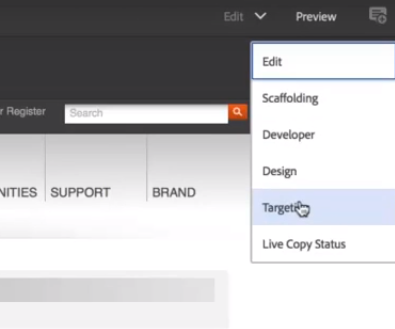
2. In the AEM editor, select Edit link which is displayed on the top right corner.
3. By clicking Edit, a list of editing options will open. Select Target from this list.
4. On top menu Activity, dropdown will be displayed.
5. In this Activity dropdown, all the activities are shown, but we are not using them but we are going to create a new activity.
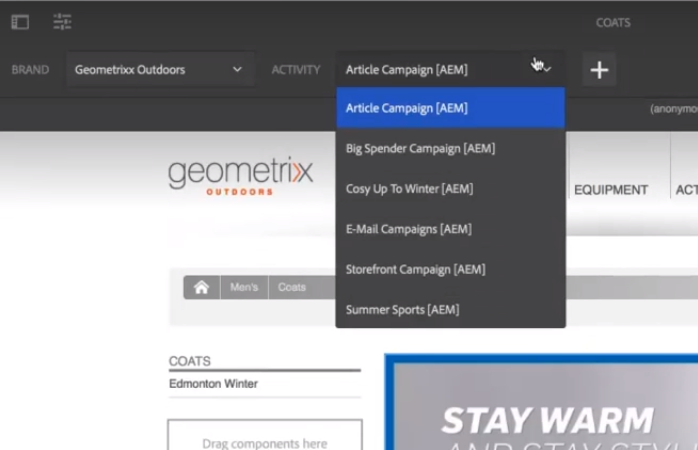
6. Click on + sign in is placed right after the Activities dropdown.

7. This will open the New Activity popup. This popup populates the field Name, Targeting Engine, Target Configuration, and Activity Type fields.
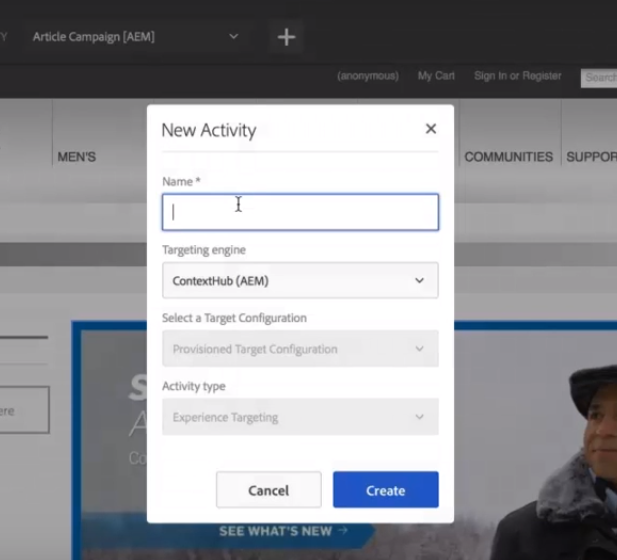
8. Here we need to give the activity a unique name, select Adobe Target in Targeting Engine dropdown, Select the Provisioned Target Configuration in configuration dropdown and select Experience Targeting in Activity Type dropdown. After setting data, we have to click on Create Button.
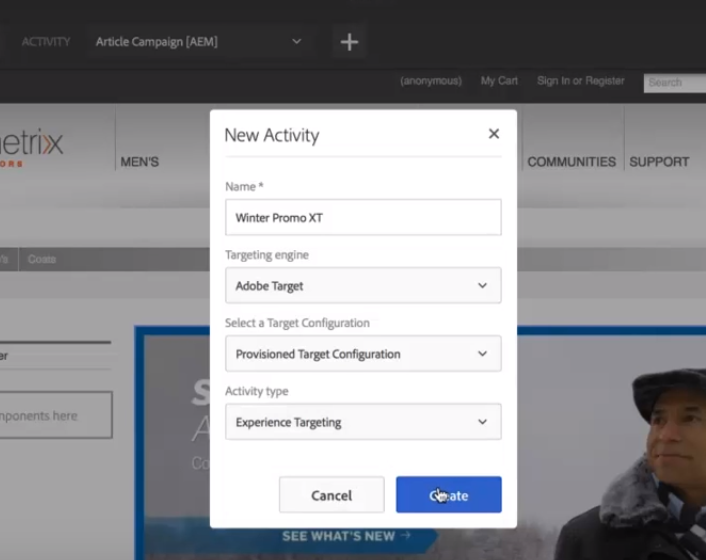
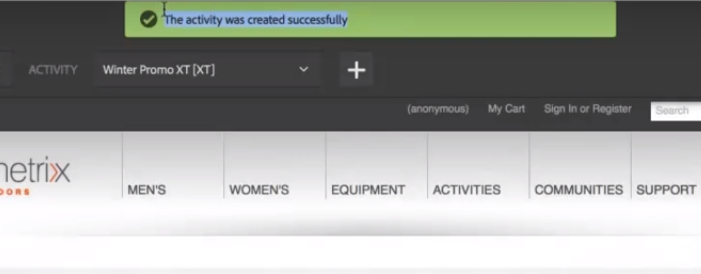
9. After clicking on Create button, New Activity popup will be closed and “The activity was created successfully” message will be appeared on the main screen.
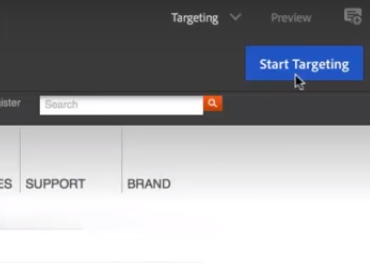
10. Now click on Start Targeting on the right corner.
11. Click on New.
12. This will open Adobe Target like view in AEM.
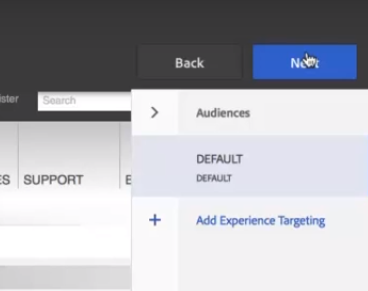
13. Now click on the + button which is displayed with the Add Experience Targeting.
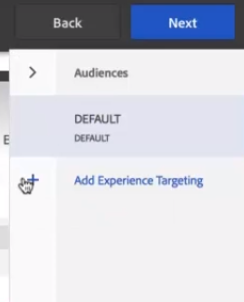
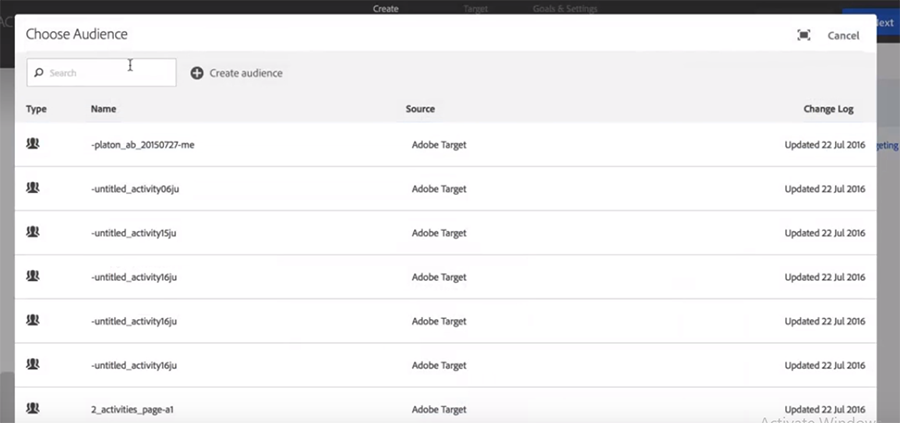
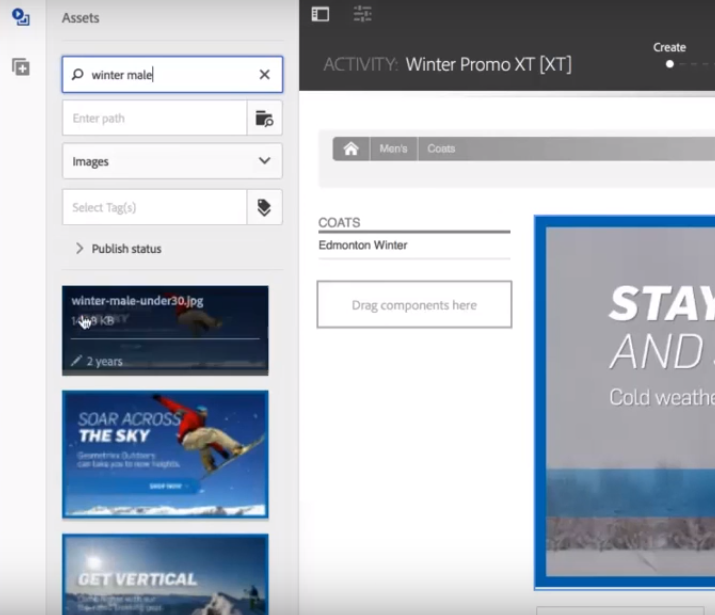
14. It will open the Choose Audience popup. Here all he prepopulated audiences are displayed.
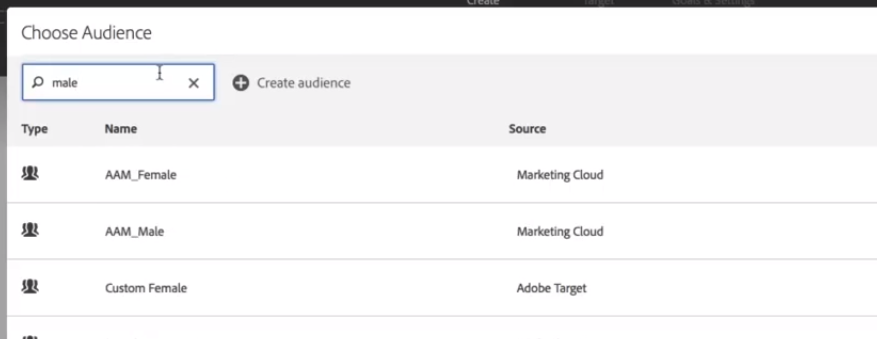
15. Search any audience in the search box. In our case, we are searching male which will display all the audiences with the male characters. Choose AAM_Male, it will close the Choose Audience popup and open another popup with the title of Create Experience.
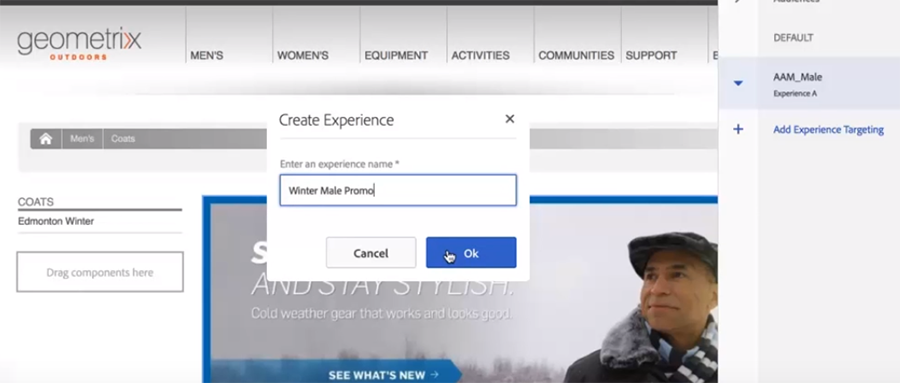
16. Give the experience a unique name, in our case we have entered Winter Male Promo. Now click on Ok button. This will create a new experience with the above name.
Create another experience by repeating from step 13 to step 16 and give the name Winter Female Promo.
17. Now select any newly created experience and then click on Assets which is shown as a small window icon on top left.
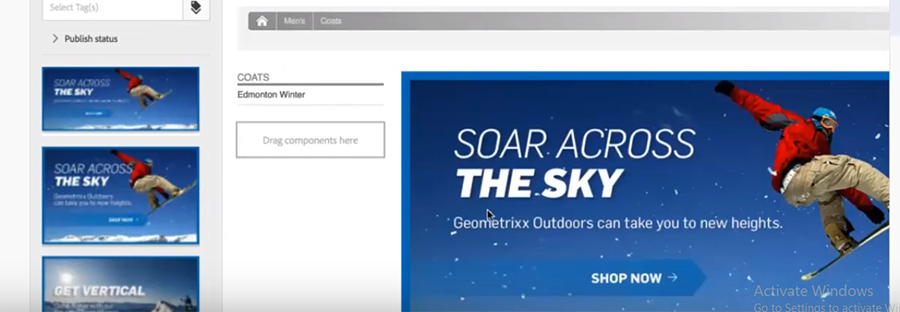
18. Search any image and drag it and drop to image placeholder.
19. The image is now attached to the placeholder.
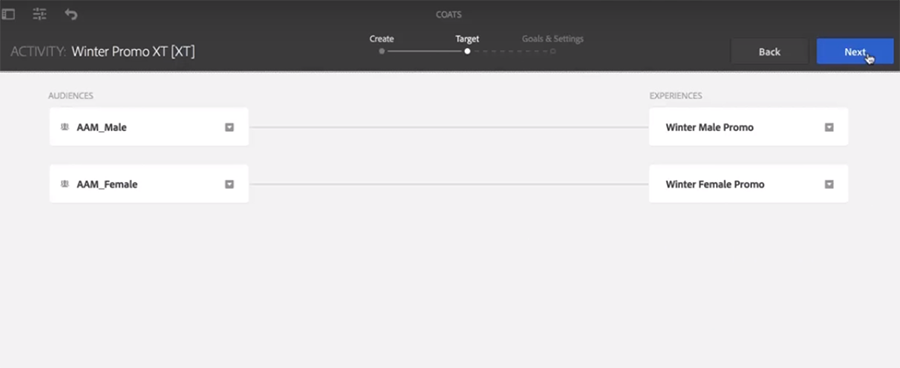
20. Click on Next to move to Target.

21. This will open the Target section where we can see that AAM_Male is mapped to Winter Male Promo Experience and AAM_Female audiences is mapped with Winter Female Promo. Now click on Next.
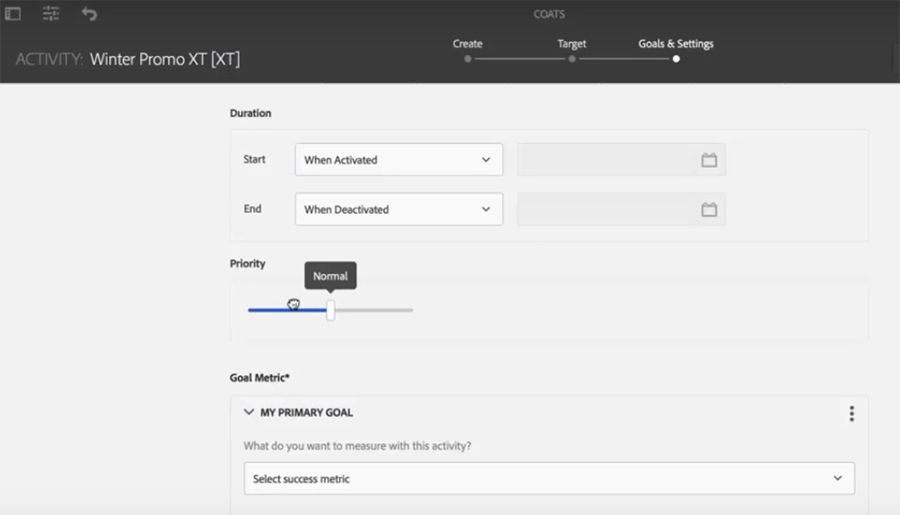
21. In the following screen give the start and End duration and select the Priority.
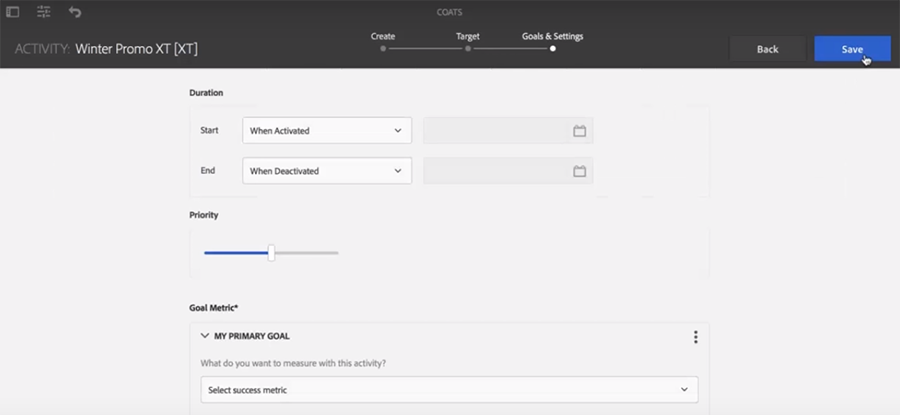
22. In our case, we have given When Activate in Start and When Deactivated in End duration and selected Normal Priority. You can give value whatever you want.
23. In Goal Metric, Select Engagement in the first dropdown and Time on Site on next dropdown.

24. Now click on the save button to save the activity.
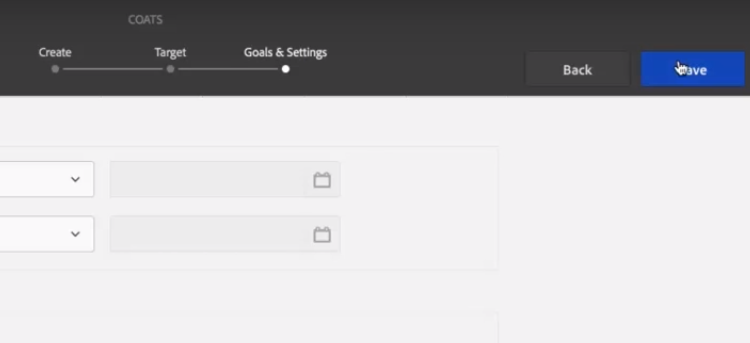
25. Saved activity success message can be seen in the below image.


1 Comment
Great read! Thank you for such useful insights.