Integrating Dell Boomi with RabbitMQ
RabbitMQ is an excellent queuing tool that can run on a variety of platforms. If you are planning on doing any asynchronous or distributed processing and you need a system to queue and process items in the backend, then you should consider RabbitMQ. This blog details the procedure to integrate RabbitMQ with Dell Boomi which is an iPaaS solution to fast track your digital transformation initiatives.
How to Integrate Message Queueing in Dell Boomi with RabbitMQ?
To install RabbitMQ, the below software needs to be installed.
ERLANG
RabbitMQ Software
ERLANG Installation
RabbitMQ runs on the Erlang virtual run-time. Hence need to install Erlang first as without it we can't get RabbitMQ to work. After installation, make sure that the correct environment variable (ERLANG_HOME) has been created during the installation. In case, the environment variable is missing, you may need to create it manually.
RabbitMQ Service Installation
Download and install the latest RabbitMQ.
RabbitMQ Web Management Plugin Installation
To access RabbitMQ web management portal following commands needs to be executed.
rabbitmq-service.bat stop
- Open a command line
- Navigate to the sbin directory of RabbitMQ Server. In my case path is “C:\Program Files\RabbitMQ Server\rabbitmq_server-3.7.14\sbin”
- Run the following command and enable the plugin
- rabbitmq-plugins.bat to enable rabbitmq_management console
rabbitmq-service.bat start
- After performing the above necessary steps navigate to http://localhost:15672/mgmt which takes to the below mentioned page.
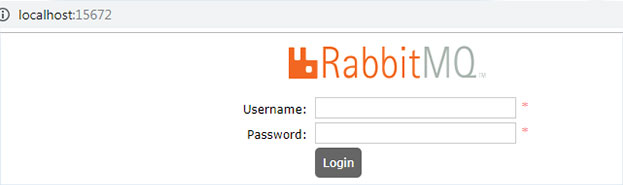
Figure 1: RabbitMQ Login page
The default credentials are as below,
- Username: guest
- password: guest
After a successful login, the following page will be accessible
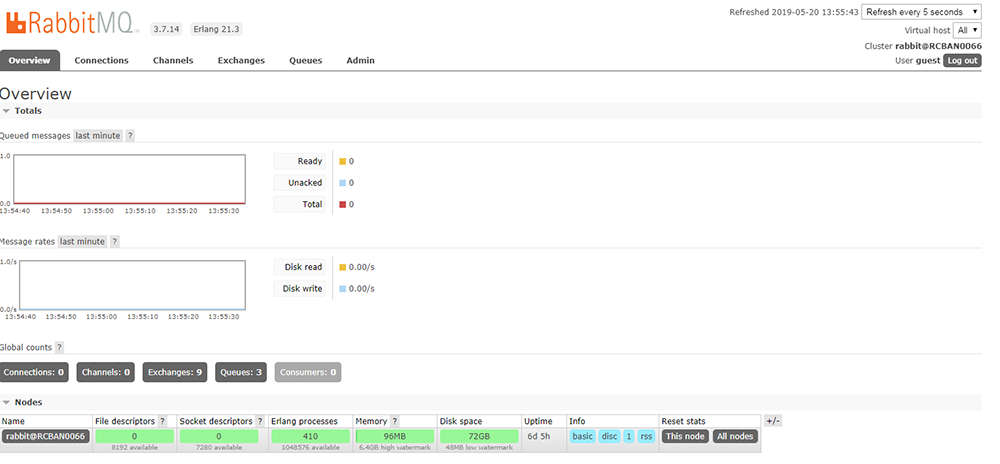
Figure 2: RabbitMQ Main Page
We need to perform the below tasks to integrate the RabbitMQ with Dell Boomi.
Exchange Creation
Queue Creation
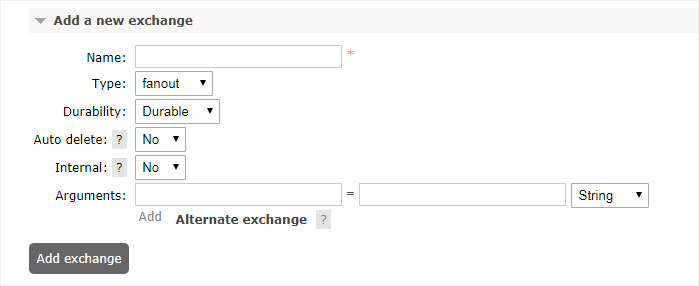
Exchange Creation
Below are the properties should be given while creating an exchange.
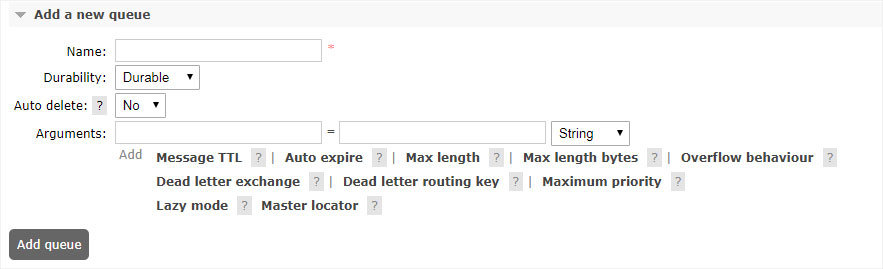
Queue Creation
Below are the properties should be given while creating a queue.
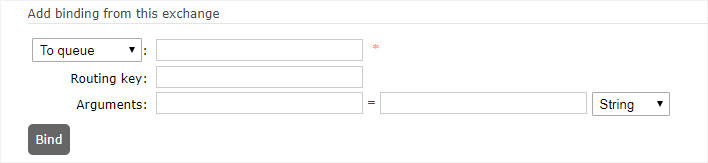
Binding Exchange to Queue
To pass the message from exchange to queue, we need to bind them together by creating a routing key. By this way, we can define which queue should receive a message from which exchange.
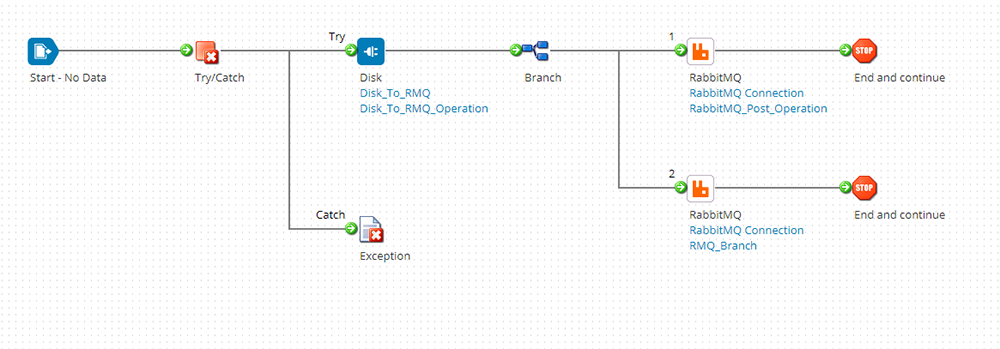
Boomi Process Workflow
Below is the process which performs the RabbitMQ integration with Dell Boomi. It receives the message from the disk directory and passes the information to a couple of queues based on the exchange configuration given at connector operation.
The first branch receives the message and directly send the same message to a single queue which is directly bound with an exchange.
The second branch sends the message to two different queues which got bound to the same exchange and same routing key.
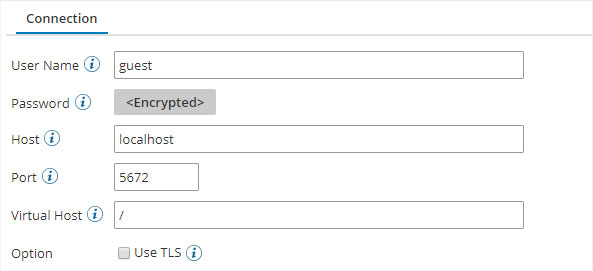
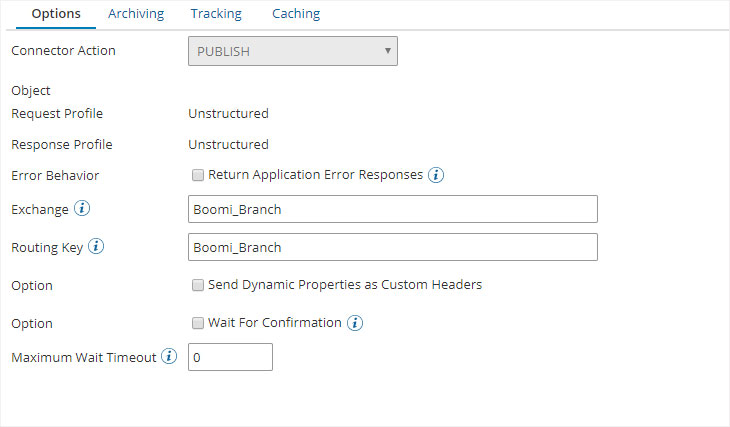
The below are the Dell Boomi connector and operation configuration at Dell Boomi connector level to integrate with RabbitMQ.
Once after the successful execution of the above Dell Boomi process messages are placed in different queues as highlighted below. The same can be viewed using the management console.
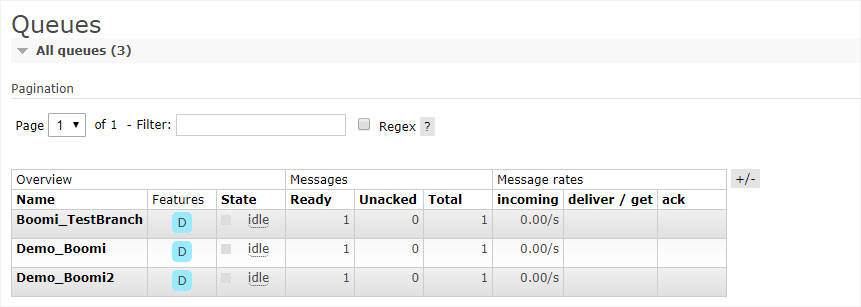
Figure 3: Queue configuration with messages
We can navigate to the corresponding queue name in the list and can view the processed messages as shown below. That will have detailed information about the exact transaction.

Royal Cyber, being one of the Dell Boomi global certified system integrator, helps customers to get the most out of their Boomi platform by providing the best integration practices to build a connected business and drive digital transformation. For more information, you can email us at [email protected] or visit www.royalcyber.com.