How to Install & Configure IBM WebSphere Portal 8.5 On Windows
This blog will explain in depth on how to correctly Install and Configure the latest Portal on your Windows Machine.
Operating System Requirement (Windows)
PREREQUISITE PRODUCTS
HARDWARE REQUIREMENTS
DOWNLOAD PART NUMBERS FOR IBM WEBSPHERE PORTAL 8.5
STEPS OF INSTALLATION
- Install IBM INSTALLATION MANAGER
- Add repositories in Installation Manager
- Installation
- Accessing IBM WebSphere Portal 8.5 and IBM WebSphere Integrated Console
- Command to Start and Stop Portal Server
In this topic I will Show you the Installation procedure of Recently Launched WebSphere Portal 8.5 in a Standalone Environment.
HARDWARE REQUIREMENTS:
Following hardware required for IBM WebSphere Portal 8.5.
Disk Space recommendations and requirements for IBM WebSphere Portal 8.5:
Minimum 8 GB total free disk space recommended for Overall installation.- Minimum 3 GB free disk space for installation of IBM Installation Manager and the Installation Manager shared directory.
- Minimum 2 GB free disk space for installation of WebSphere Application Server.
- Minimum 3 GB free disk space for installation of WebSphere Portal.
Memory recommendations and requirements for IBM WebSphere Portal 8.5:
- Minimum 4GB of RAM is required for standalone testing Environment.
- In a production environment, 8GB is an optimal starting point for RAM.
DOWNLOAD PART NUMBERS FOR IBM WEBSPHERE PORTAL 8.5:
Using either IBM’s Passport Advantage or IBM’s Partnerworld Software Catalog locate the eAssembly part number CRRW9ML. The download list will include the following component parts:
- IBM WebSphere Portal and Web Content Manager V8.5 Multilingual Quick start Guide (CIYE7ML)
- IBM WebSphere Portal Enable Setup V8.5 Multiplatform Multilingual (Setup, Install, WAS ND, SDK) (CIYW3ML)
- IBM WebSphere Portal Server Install V8.5 Multiplatform Multilingual (Setup, Install, WAS ND, SDK) (CIYV9ML)
- IBM WebSphere Portal Enable Install V8.5 Multiplatform Multilingual (Setup, Install, WAS ND, SDK) (CIYW4ML)
- IBM WebSphere Application Server Network Deployment V8.5.5.2 Multiplatform Multilingual (Setup, Install, WAS ND, SDK) (CIYW0ML)
- IBM WebSphere SDK Java Technology Edition V7.0.6.1 Multiplatform Multilingual (Setup, Install, WAS ND, SDK) (CIYW1ML)
- IBM WebSphere Portal V8.5 Remote Search and Document Conversion Services Multiplatform Multilingual (CIYW2ML)
STEPS OF INSTALLATION
I have selected Windows Server 2008 R2 Enterprise Base Edition as an Operating System for my Virtual Machine and assign 4GB RAM to it.
Install IBM INSTALLATION MANAGER:
- After downloading all part numbers extract all in their respective folder
- Run Setup from (CIYW3ML) which is “IBM WebSphere Portal Enable Setup V8.5 Multiplatform Multilingual “, it will first install Installation Manager in the directory C:\IBM\Installation Manager\eclipse.
- When you will see Installation Finished, Click on Restart Installation Manager.
- Then the next step is to add repository.config file of all products, so that you can install products and packages.
Add repositories in Installation Manager:
After you install the Installation Manager, complete the following steps to add the repositories where the installation media exists which means you have to add repository.config file from all 5 products folder which has been extracted earlier.
- Open the IBM Installation Manager and go to File > Preferences > Repositories.
- Select Add Repositories.
- Select Browse and go to the (All Products)/Setup/repository.config file and then click OK.
- Ensure that all required repositories are checked. Then, click Test Connections to ensure that the IBM Installation Manager can successfully access the directory where the service repositories are stored.
- Select Apply.
- Select OK.
Note: Add repository.config file of each product by going into the folder of that product software.
After successfully adding repository.config and test connection You Now move to Installation of Products.
INSTALLATION:
1. On the main IBM Installation Manager panel, select Install. After this You can see the following screen.
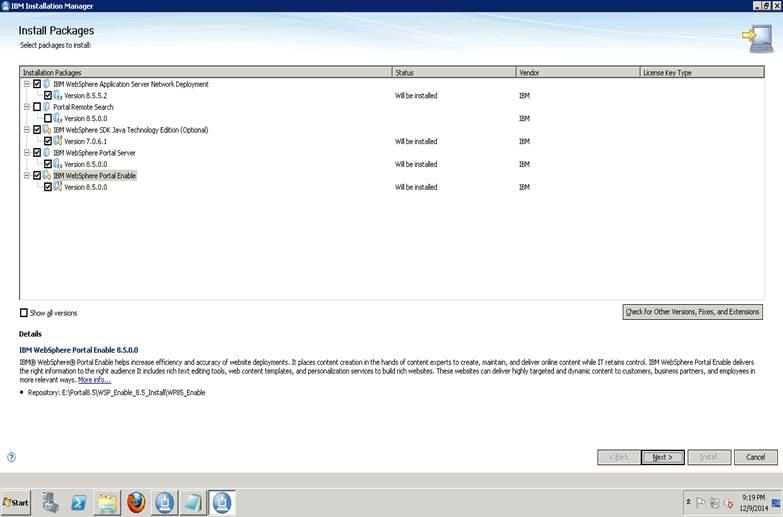
2. Select Packages from this screen and click Next (I have selected all except Portal Remote Search).
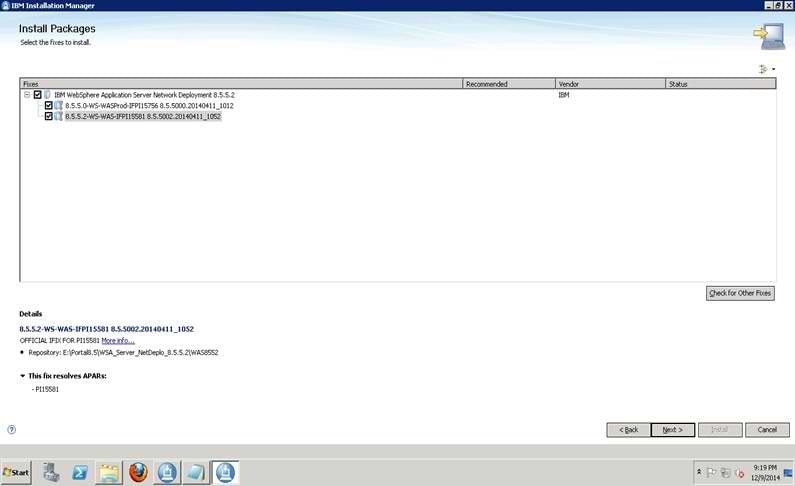
3. Select both fixes for WebSphere Application Server Network Deployment 8.5.5.2 and click Next
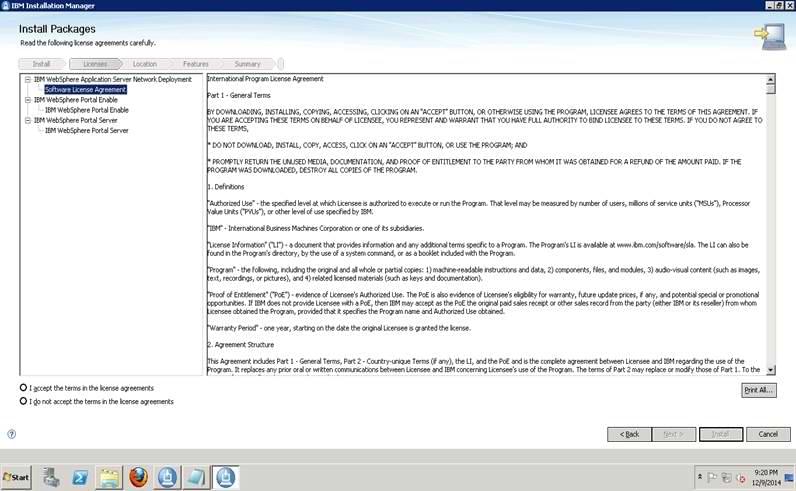
4. Accept License agreement and Click Next
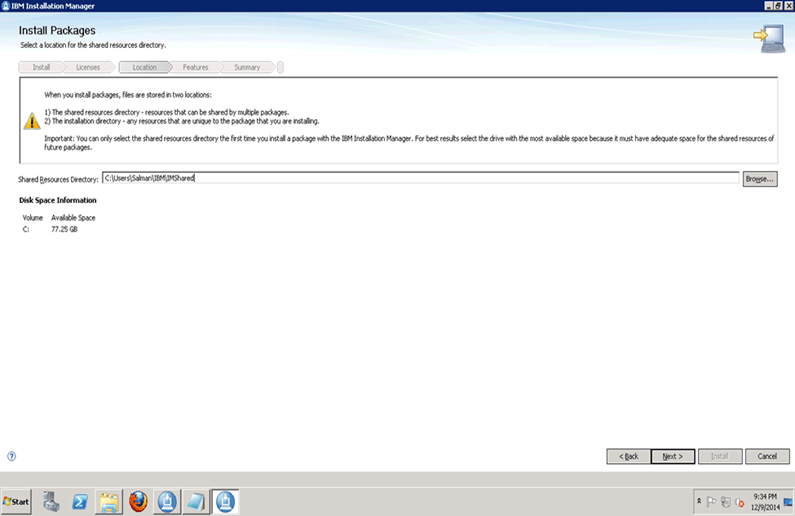
5. Select a location for shared resource Leave default and Click Next
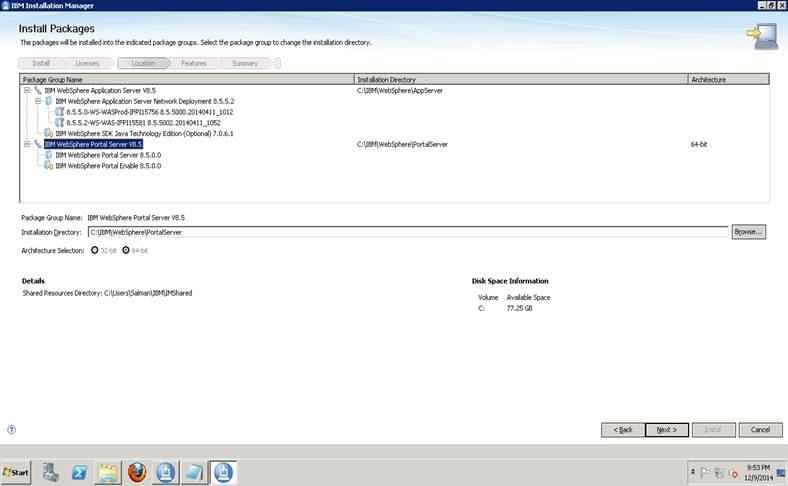
6. In this step you give the location of Installation Directory for both WebSphere Application Server and Portal Server , Select the top first “IBM WebSphere Application Server v8.5” and give path in Installation Directory Panel C:\IBM\WebSphere\AppServer.
7. Then Select the “IBM WebSphere Portal Server v8.5” and give path in Installation Directory Panel C:\IBM\WebSphere\PortalServer. As you can see in the above figure and Click Next.
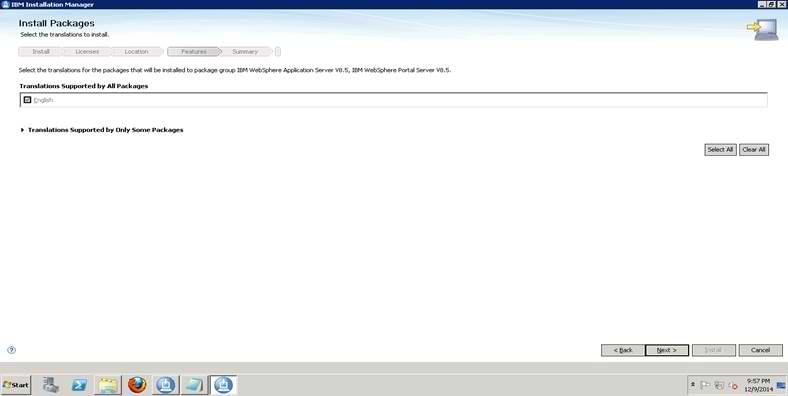
8. In this Screen, You can select the translation to Install I Have selected English, Click Next
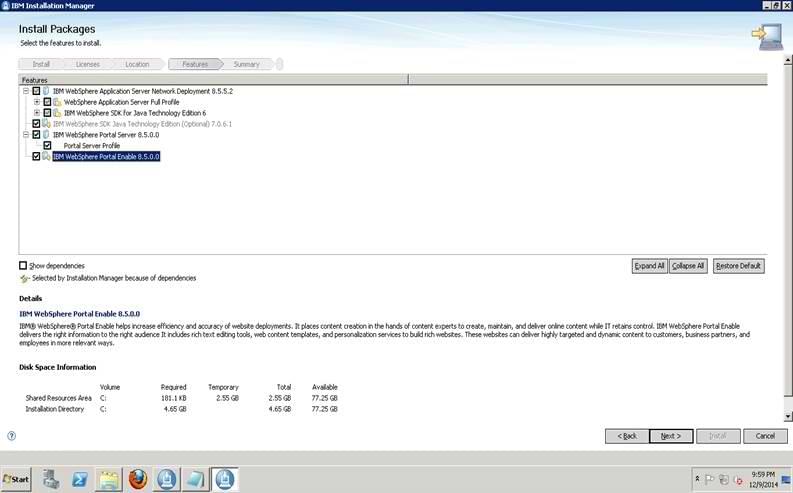
9. In this step Select Features to install, select all features and Click Next. You can also see Disk Space Information in this step.
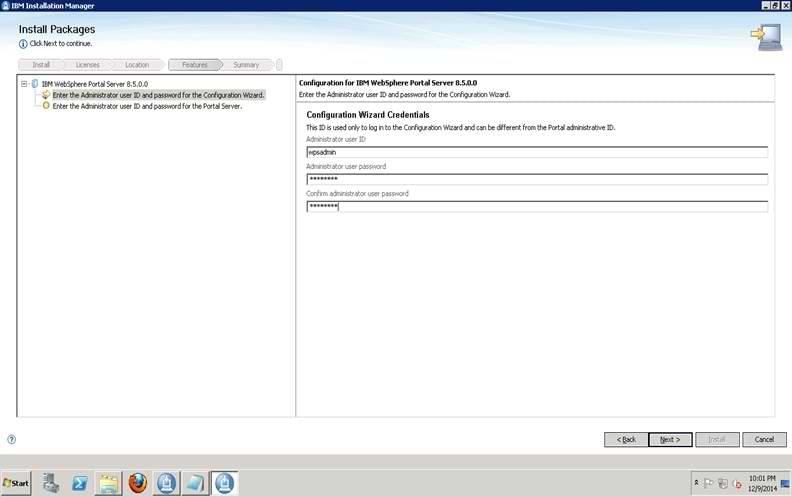
10. In this step, you set the Administrator User Id and Password for Configuration Wizard and Portal Server.
11. Set User Id: wpsadmin and Password: wpsadmin for Configuration Wizard, Then Select second one which is “Enter Administrator User ID and password for the Portal Server”.
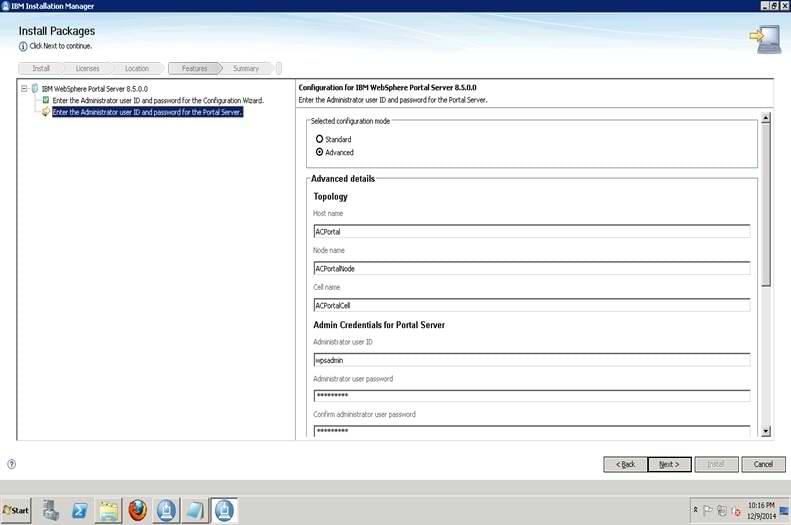
12. Select Advance, and from here you can set Hostname, Node name, Cell Name, Context Root, Default Home, Personalized Home, Profile Name, Profile Path. These values comes default according to your machine Hostname on which you are doing Installation and path as you have defined in earlier step.
13. In my Case the details are as follows:
Hostname: ACPortal
Node name: ACPortalNode
Cell name: ACPortalCell
Context Root: wps
Default Home: portal
Personalized Home: myportal
Profile Name: wp_profile
Profile Path: C:IBMWebSpherewp_profile
14. Set User ID: wpsadmin and Password: wpsadmin, Scroll down to check other details.
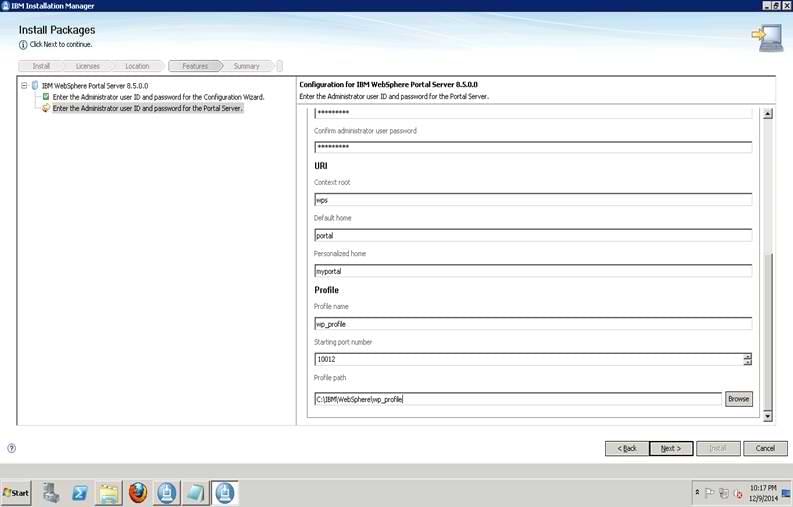
15. Leave starting port to default, no need to worry about that, just put the values as I mentioned above and Click Next.
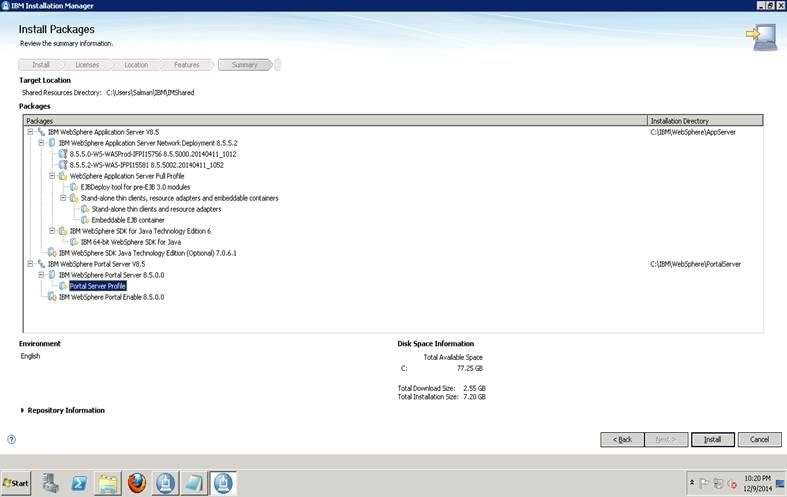
16. Summary Screen appears, after having a review click on Install.
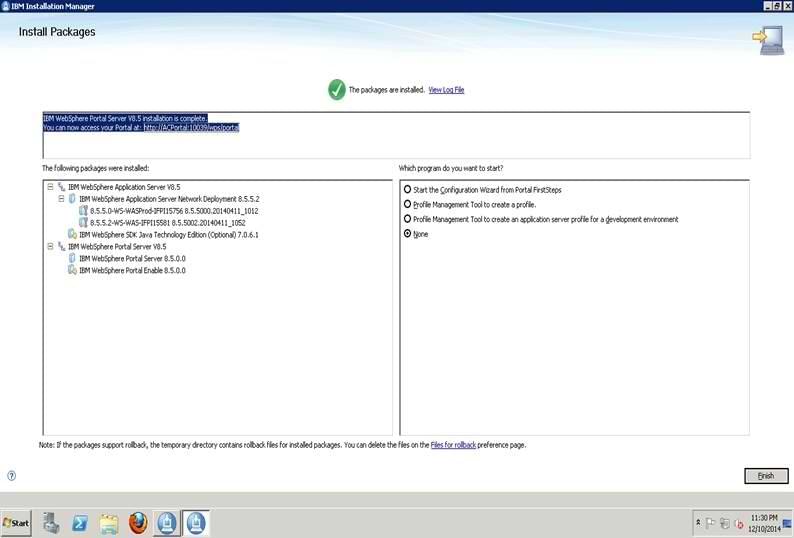
17. Wait till this screen appears, you will see a message with a green mark that packages are installed, and in this step see a highlighted two lines you can find out your Portal URL, In my case it is
http://ACPortal:10039/wps/portal
18. Select None in the right Pane of screen and click Finish.
Accessing IBM WebSphere Portal 8.5 and IBM WebSphere Integrated Console:
a). Access IBM WebSphere Portal 8.5 by just pasting the above link in browser
http://ACPortal:10039/wps/portal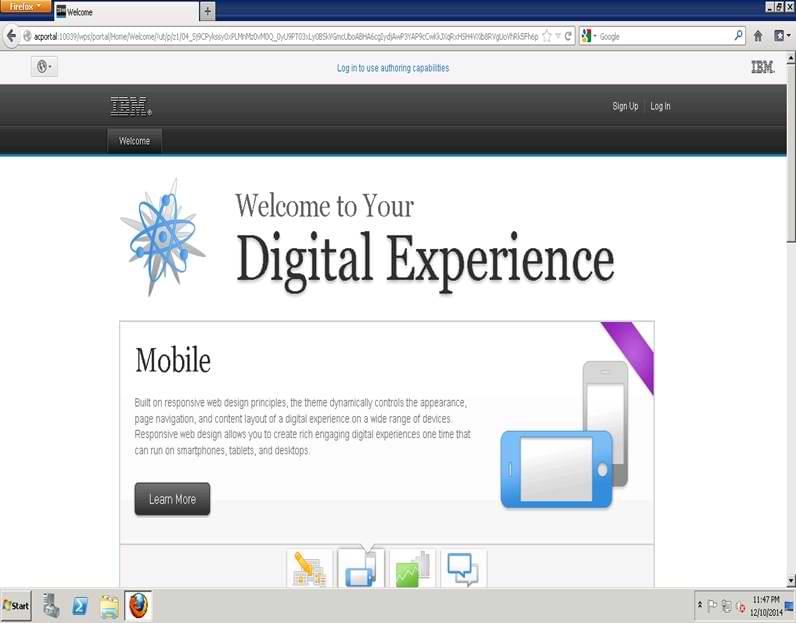
b). Login screen appears, Login with the portal admin User ID AND PASSWORD you have set in the configuration time, In my case it is User ID: wpsadmin and Password: wpsadmin
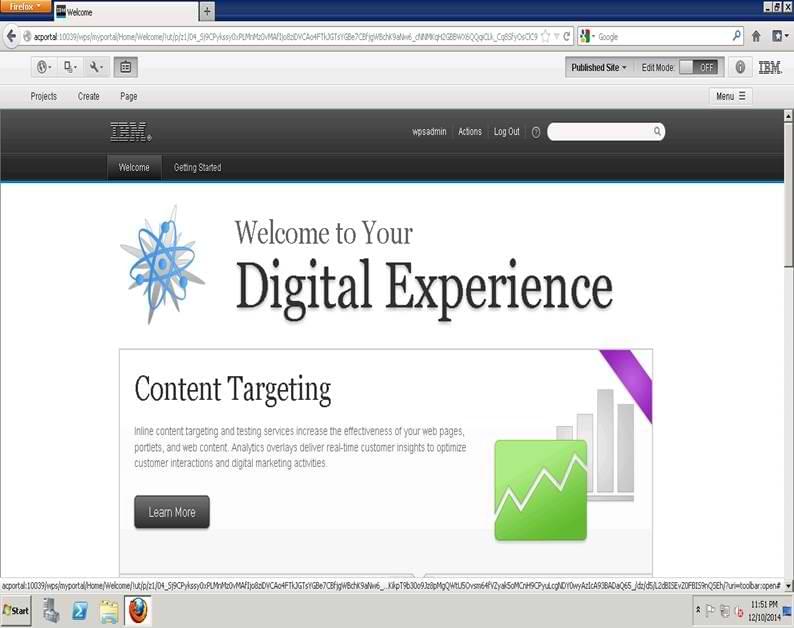
c). Here you can see the screen after login. Enjoy your new IBM WebSphere Portal 8.5.
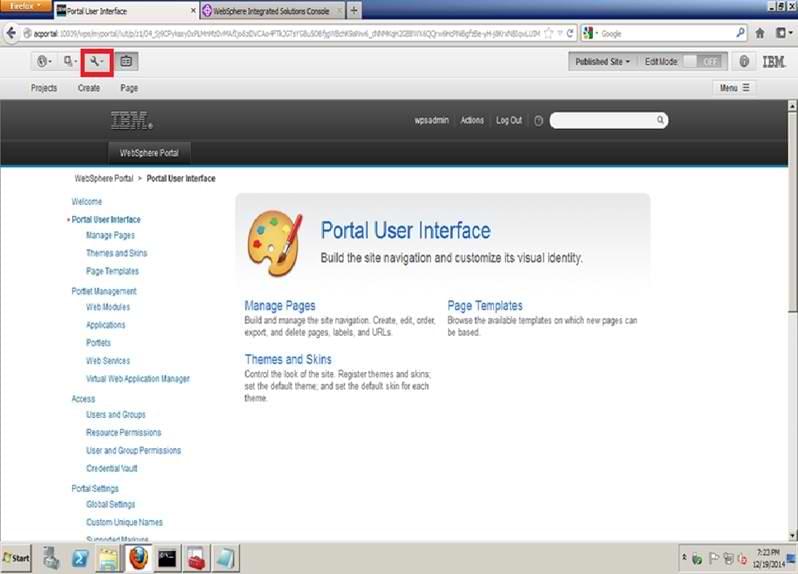
d). By clicking on Setting Icon on the top left I have highlighted with red you can set and administer your portal User Interface, like Manage Pages, Themes and Skins, Page Templates and so many features.
e). You can access your WAS Integrated Console In my case the link for accessing WAS Console is
http://acportal:10038/ibm/console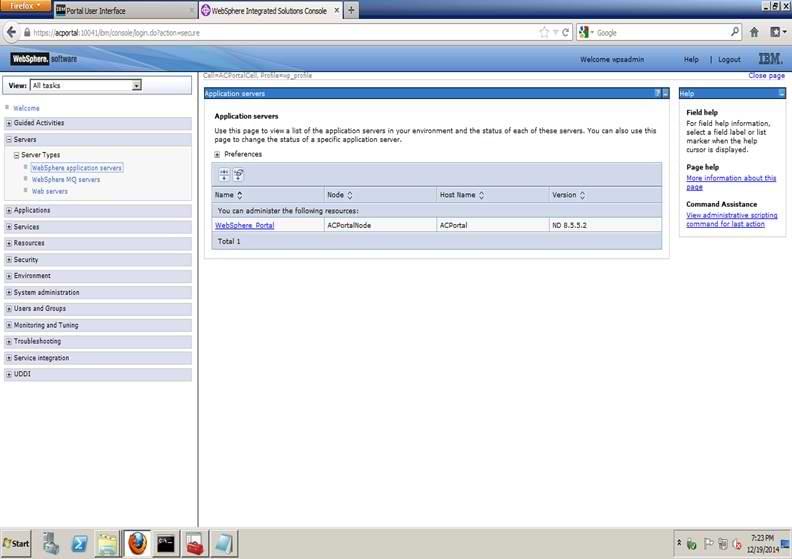
f). You can see the WebSphere Integrated Console in the above figure.
Command to Start and Stop Portal Server:
You can start or stop your WebSphere_Portal (server) from path:
C:\IBM\WebSphere\wp_profile\bin>For Start: Command is startServer.bat WebSphere_Portal
For Stop: Command is stopServer.bat WebSphere_Portal

1 Comment
This article has the best information about the installation and configures IBM Websphere Portal 8.5 on Windows. I like such type of post very much and keep on writing this kind of stuff in the future.