Containerizing Mule Applications with Docker
The goal of this blog post is to demonstrate how Mule Applications can be containerized using Docker. In the sample demo, we will be using Mule domain projects for the project resource configuration.
Introduction
Mule
Mule is a lightweight Java-based enterprise integration platform used for the integration of different applications. It enables the applications to communicate with each other by exchanging data.
A Mule domain project is used to define selected common resources and define them under one domain. Once defined, any application under that domain can access the shared resources defined in that domain.
Docker
Docker is a container used for packaging code and all its dependencies so that the application can run quickly and reliably on any computing environment. At the heart of the docker container is the docker image which is comprised of a series of layers. Layers represent an instruction in the image’s Dockerfile.
Pre-requisites
The following are required for the demo -
- Mule EE Standalone distribution – This can be downloaded from the MuleSoft website.
- Compiled Mule application target files.
Steps
The following steps are taken for the demonstration –
- Build the required Mule Domain applications.
- Create a Dockerfile which defines the layers required for the application.
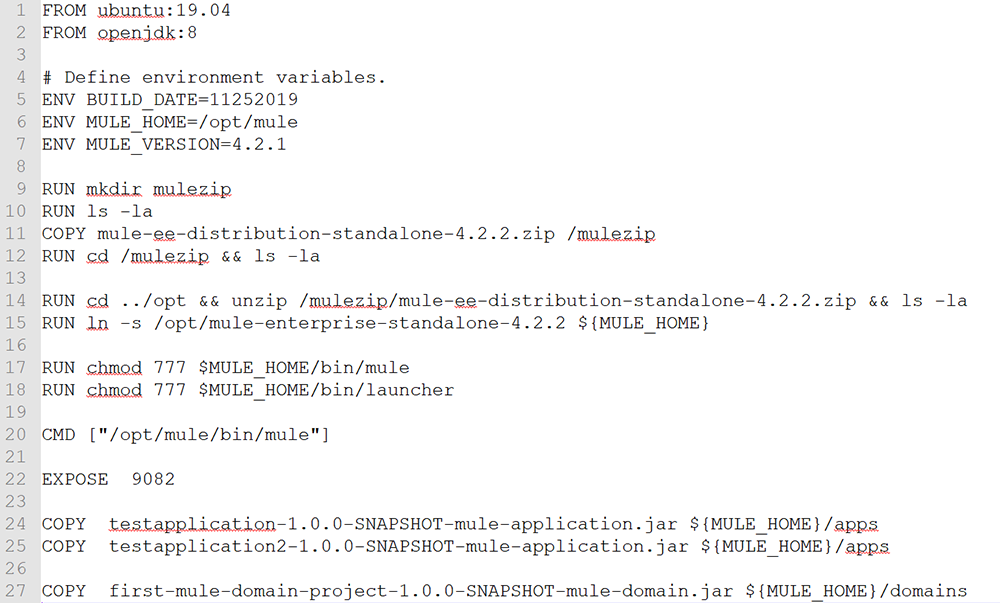
Figure 1 Dockerfile contents
The Dockerfile contains steps which are used to build the application. On a high level, it first fetches the OS and libraries (lines 1 and 2) used to run the Mule runtime. It defines the command to execute when the container is run (line 20). It then exposes the port used to communicate with the application from outside (line 22). Finally, it copies the built applications and domain from the local directory to the appropriate directory inside the container image (lines 24,25, and 27). The domain project is used here to define a common listener port which is then referenced by the two applications.
- Build the Docker image using the docker build command Docker build . -t hello
The command builds the image using the Dockerfile present in the current working directory and tags it with the name hello.
After the build, we get the following console output indicating that the Docker image is successfully built.
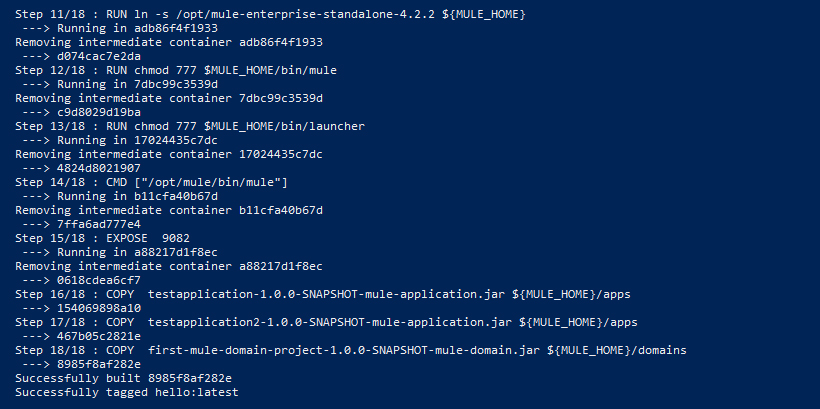
Figure 2 Output of Docker image build
- Run the application using the docker run command docker run -it --rm -p 9082:9082 hello
With this, the Mule runtime environment will start with the applications and the mule domain deployed
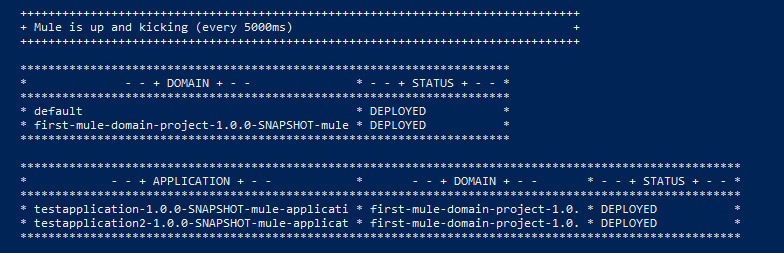
Figure 3 Output of Docker image run
- View the currently running containers using the below command – Docker ps
Figure 4 View currently running docker images
We see that our application is currently running on localhost with the port 9082 exposed.
- Send a request to our running application (both applications are accessible on the same port because of the domain project concept utilized) using a rest client like Postman
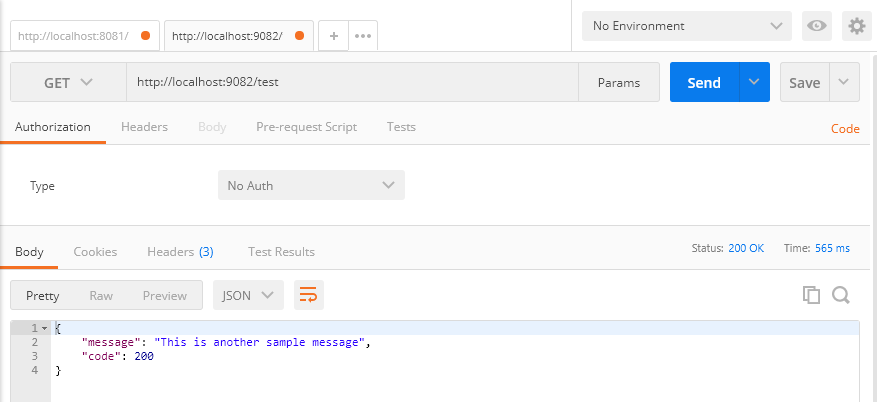
Figure 5 Request sent to the running application
In the body, we see the message sent by our application in response to the request sent.
Summary
In this blog, we showed how Docker images could be used to deploy Mule applications. These can be used to deploy applications quickly in any environment. For more information on how we can containerize Mule application with Docker, you can email us at [email protected] or visit www.royalcyber.com.