Apache Kafka Integration with MuleSoft
Written by Muhammad Aqib Arif
Senior Software Engineer - Middleware
In this blog, we will see how to integrate Apache Kafka with MuleSoft. First, we’ll create mule flow to publish streaming data to Apache Kafka and then we’ll create a mule flow that will consume Kafka streaming data in MuleSoft. Before we get into details, let’s learn a little bit about Apache Kafka.
What Is Apache Kafka?
Apache Kafka is an event streaming platform proficient at handling trillions of events a day. Primarily considered as a messaging queue, Kafka is based on the thought of a distributed commit log. Kafka has rapidly evolved from a messaging queue to a complete event streaming platform. Apache Kafka creates real-time streaming apps and data pipelines. It is scalable, fault-tolerant, and incredibly fast.
How To Setup ZooKeeper and Apache Kafka?
- Download ZooKeeper from the link below
https://www.apache.org/dyn/closer.lua/zookeeper/zookeeper-3.6.1/apache-zookeeper-3.6.1-bin.tar.gz - Download Apache Kafka from the link below
https://www.apache.org/dyn/closer.cgi?path=/kafka/2.5.0/kafka_2.12-2.5.0.tgz - Now open Zookeeper config directory. For me it is C:\apache-zookeeper-3.6.1-bin\conf
- Rename file “zoo_sample.cfg” to “zoo.cfg”
- Open zoo.cfg in any text editor and edit dataDir=/tmp/zookeeper to: C:/apache-zookeeper-3.6.1-bin/data
- Run ZooKeeper by opening a new command prompt in bin directory and type zkServer.bat
(ZooKeeper server should be up and running). - Now open Kafka config directory. For me it is C: \kafka_2.13-2.5.0\config
- Edit the file “server.properties”.
- Find and edit the line“dirs=/tmp/kafka-logs” to “log.dir= C:\kafka_2.13-2.5.0\kafka-logs”.
- Now go to root directory of Apache Kafka and type below command in command prompt to run Apache Kafka.
.\bin\windows\kafka-server-start.bat .\config\server.properties
Creating Kafka Topic
- Open a new command prompt in the directory C:\kafka_2.13-2.5.0\bin\windows
- Type the below command and enter
kafka-topics.bat --create --zookeeper localhost:2181 --replication-factor 1 --partitions 1 --topic test - You should notice that the new topic named “test” has been created

Creating Producer and Consumer to Test Kafka Server
- Open a new command prompt in the directory C:\kafka_2.13-2.5.0\bin\windows
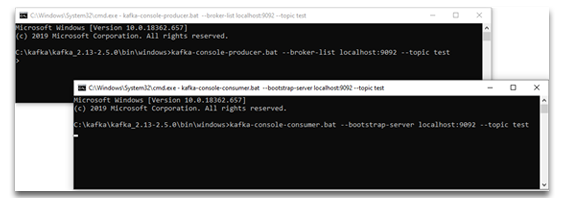
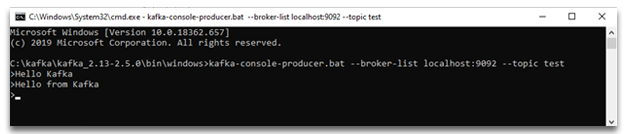
- To connect a producer, type following command
kafka-console-producer.bat --broker-list localhost:9092 --topic test - Now open another command prompt in the same directory
- To connect a consumer, type following command
kafka-console-consumer.bat --bootstrap-server localhost:9092 --topic test - Producer and consumer are now connected with topic named test
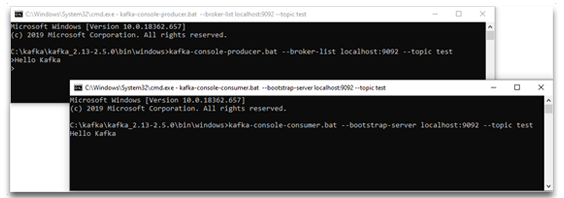
- Now you can type anything in the producer command prompt after which you should be able to see the message in consumer command prompt
Creating MuleSoft project to integrate with Apache Kafka
MuleSoft, along with Apache Kafka connector, empowers you to network with the Apache Kafka messaging system and accomplish seamless integration between your Mule app and Kafka cluster using Mule runtime engine (Mule).
In this section of the blog, we’ll see how to publish and consume Kafka streams using MuleSoft. Let’s create two flows in the mule project. The first flow will publish Kafka streams to the Kafka cluster and the second flow will consume the Kafka streams from Kafka cluster.
Steps to create producer flow
- Create a Mule project in Anypoint studio and name it as you like
- Drag and drop flow component from mule palette to mule configuration and name it as producer-flow
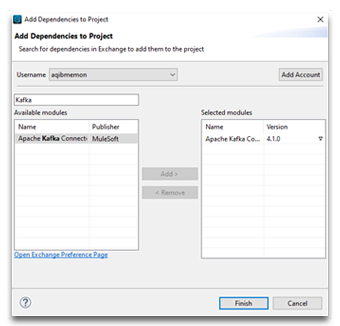
- Search and add Apache Kafka module from Anypoint Exchange
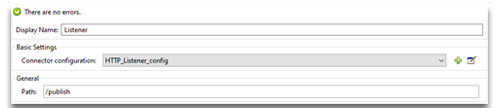
- Now drag HTTP Listener component from mule palette and drop it to producer-flow
- Configure HTTP Listener Global configuration with default values and set path as /publish
- Drag publish operation of Apache Kafka component and drop it in producer-flow after HTTP Listener component
- Add Apache Kafka Producer Configuration for publish operation
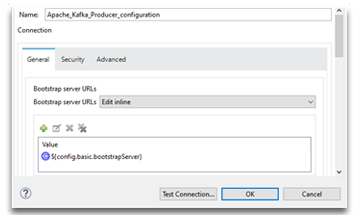 - value of this property ${config.basic.bootstrapServer} is localhost:9092
 - Test connection and click OK
- Now add general settings for Apache Kafka publish operation as shown in image below
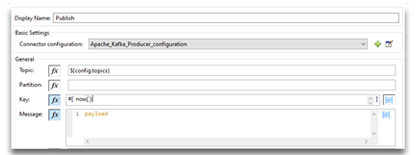
- For Topic filed, value of this property ${config.topics} is test- In Key field, now() method is used as current datetime
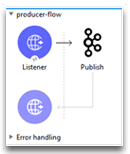
- The producer flow should look similar to the image below
- Now run mule project and test producer flow
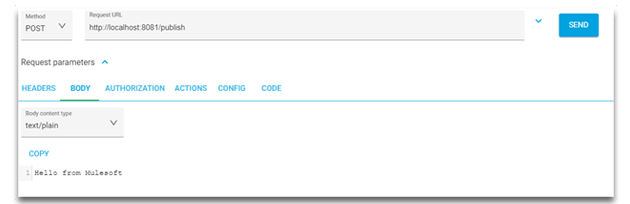
- Open any rest client like postman and hit the URL http://localhost:8081/publish with message body
- Now verify in Kafka consumer, the streaming data is received

Steps to create consumer flow
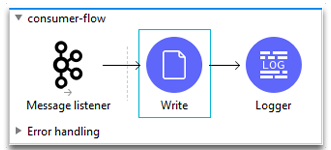
- Drag and drop Flow component to mule configuration and name it as consumer-flow
- Drag Message Listener component of Apache Kafka and drop it to consumer flow
- Add and configure Global Element properties for Apache Kafka consumer
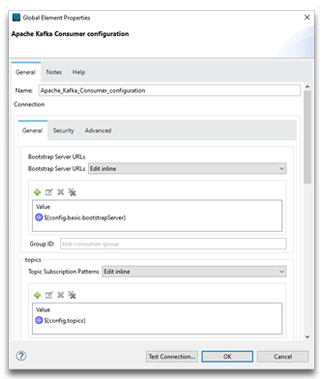 - value of property ${config.basic.bootstrapServer} is localhost:9092
- value of property ${config.topics} is test - Test connection and click OK
- Let all other fields have default values
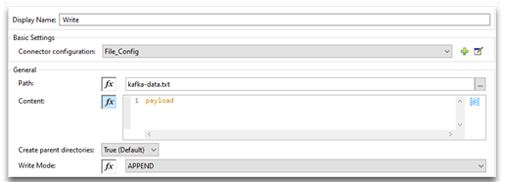
- Now add and configure write operation of File component right after Message Listener
- Now consumer-flow should look similar to the image below
- Run the application and test consumer flow
- Write streaming data to Kafka producer
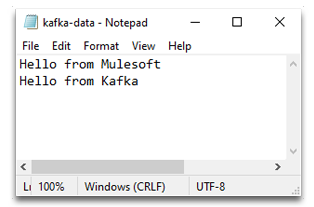
- Now verify that the write operation has written Kafka streams in a file
Conclusion
For new users, you can try the above steps to get started, and for others who are planning to use the Kafka Connector, reach out to us to see what out-of-the-box connectors we have to offer. You can email us at [email protected] or visit www.royalcyber.com


1 Comment
Nice article